
“Learn a simple, step-by-step method for drafting a Basic Bodice Block without Darts.”
I came across many people and students who don’t know simple basic bloody block and they feel it’s very difficult but trust me it’s the most important and very easy to make it.
So, Let’s start with “What is basic body block?”
A basic body block is nothing but a pattern or layout of your upper body from shoulder to waist.
So now we will see, why it is important.
A basic body block is important because, from a simple basic body block, you can make any pattern without any difficulty with the basic bodice block for the different dresses, which you will see in future blogs.
Now, let’s go ahead with the step-by-step method of basic body block.
Here I’m using example measurements for easier understanding where you can mention your measurements inside of the examples.
Measurements required:
Shoulder: ____________ 14”
Chest round:__________ 36”
Waist round:__________ 32”
Waist length:__________ 14”
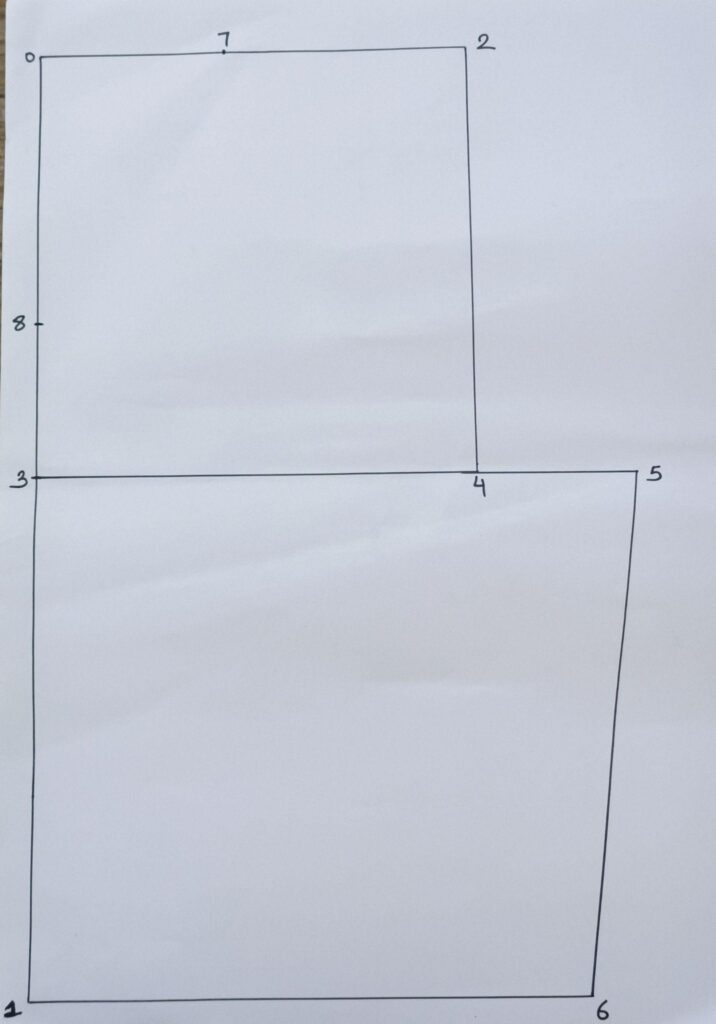
Drafting:
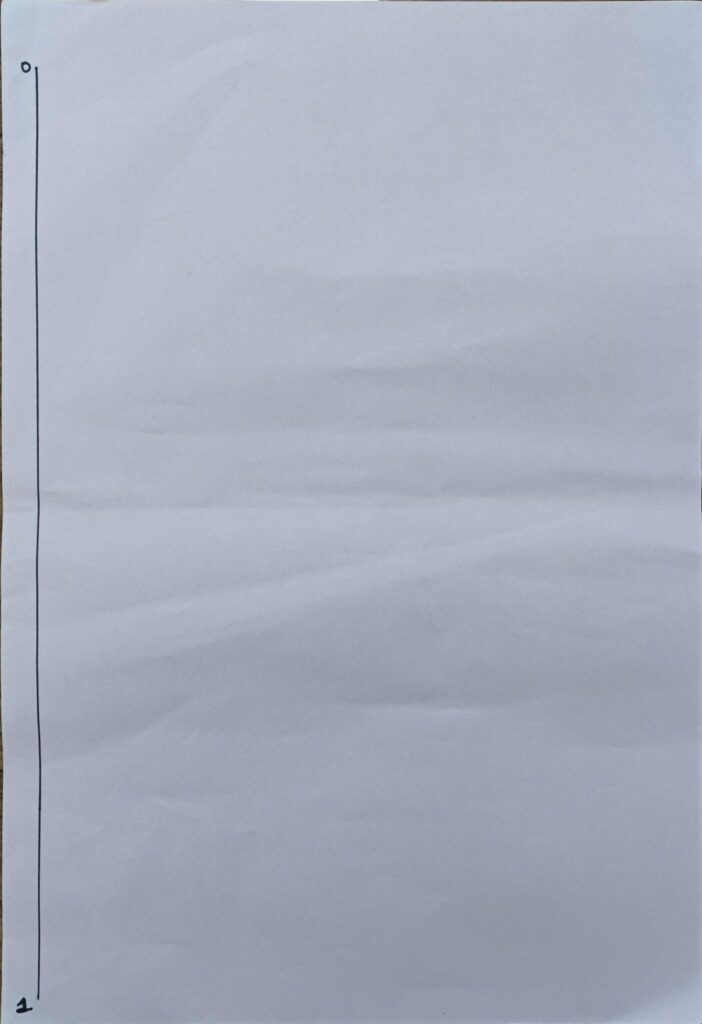
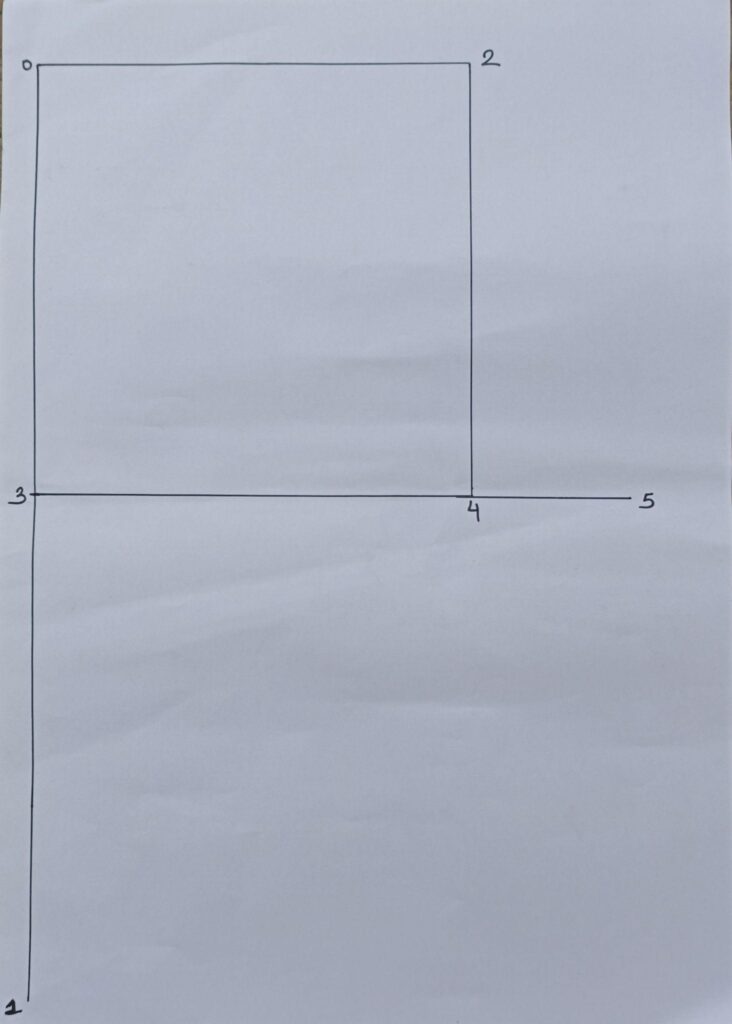
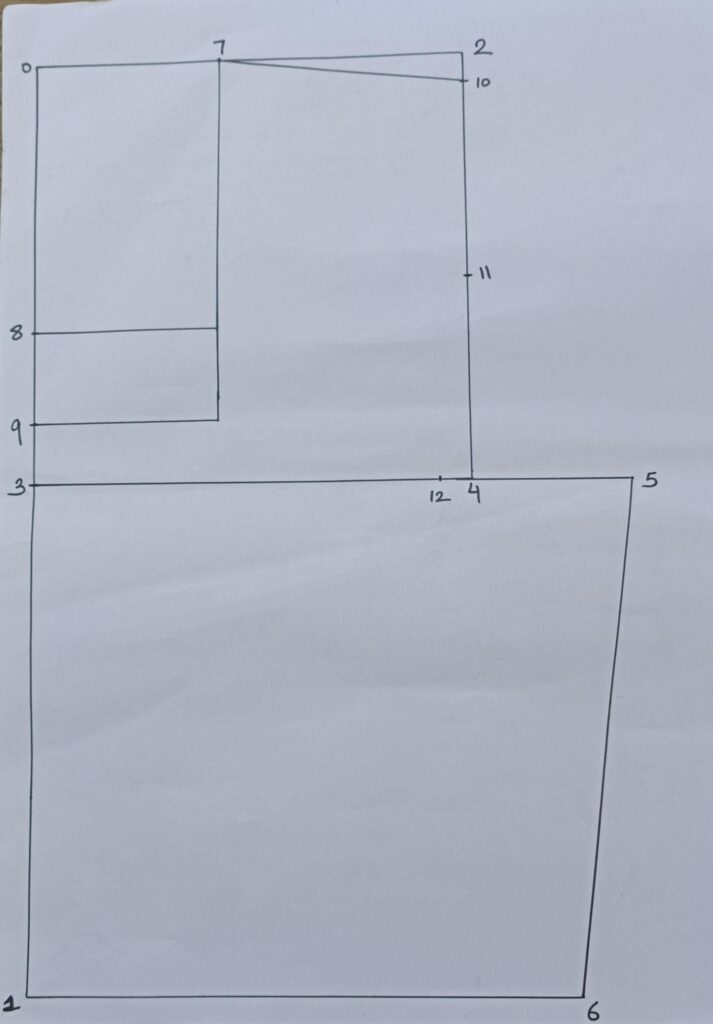
Step1: Mark (0-1) = Waist length+1”
Example: (0-1) = 15”+1”=16”
Step 2: (0-2) = Shoulder/2
Example: (0-2) = 14”/2 = 7”
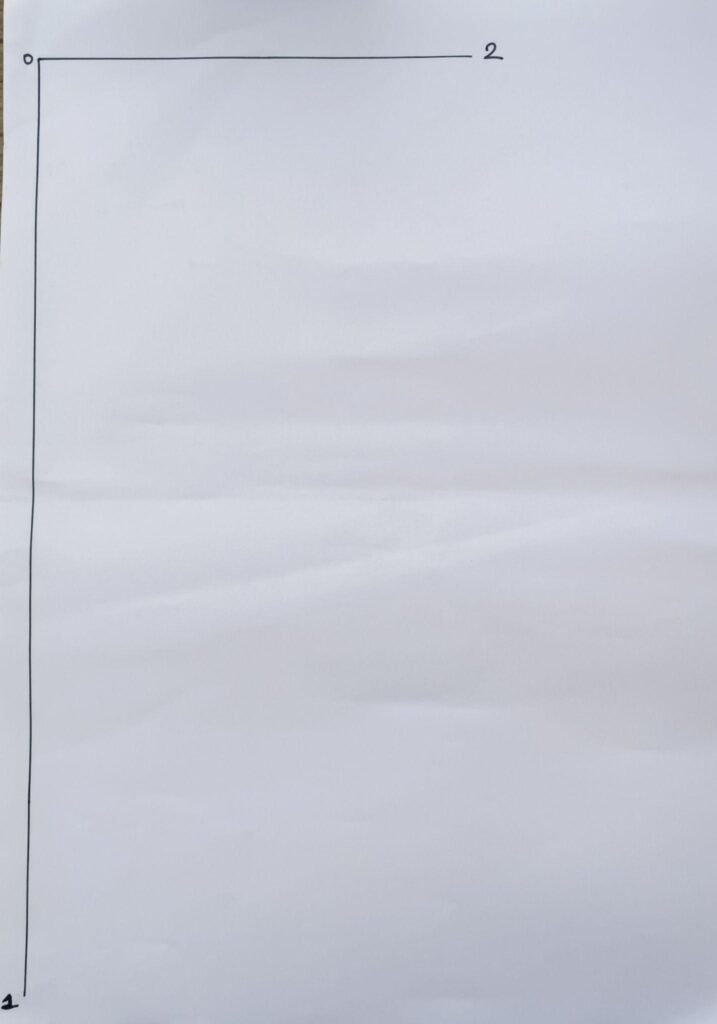
Step 3: (0-3) = Shoulder/2 (Chest line)
Example: (0-3) = 14”/2 = 7”
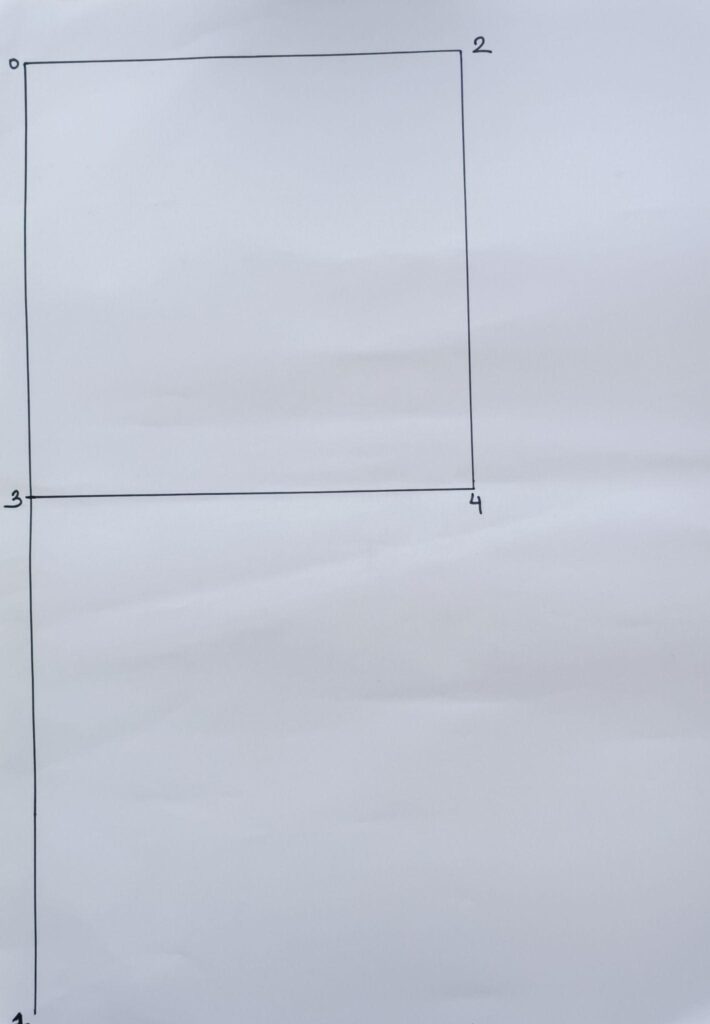
Step 4: square down to 4 from 2 and 3
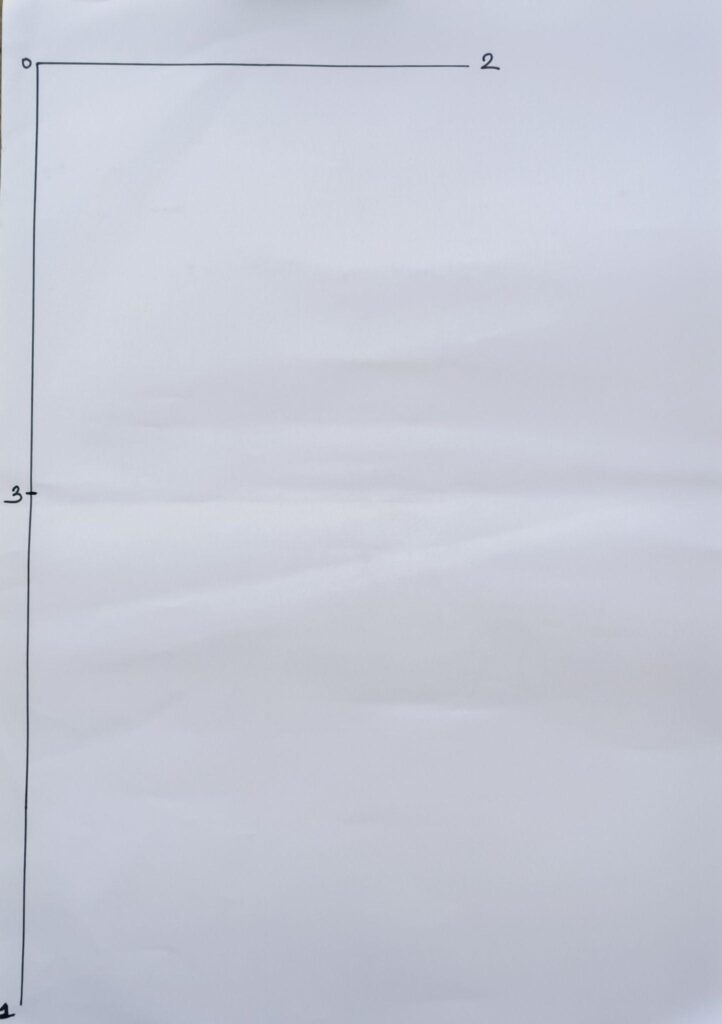
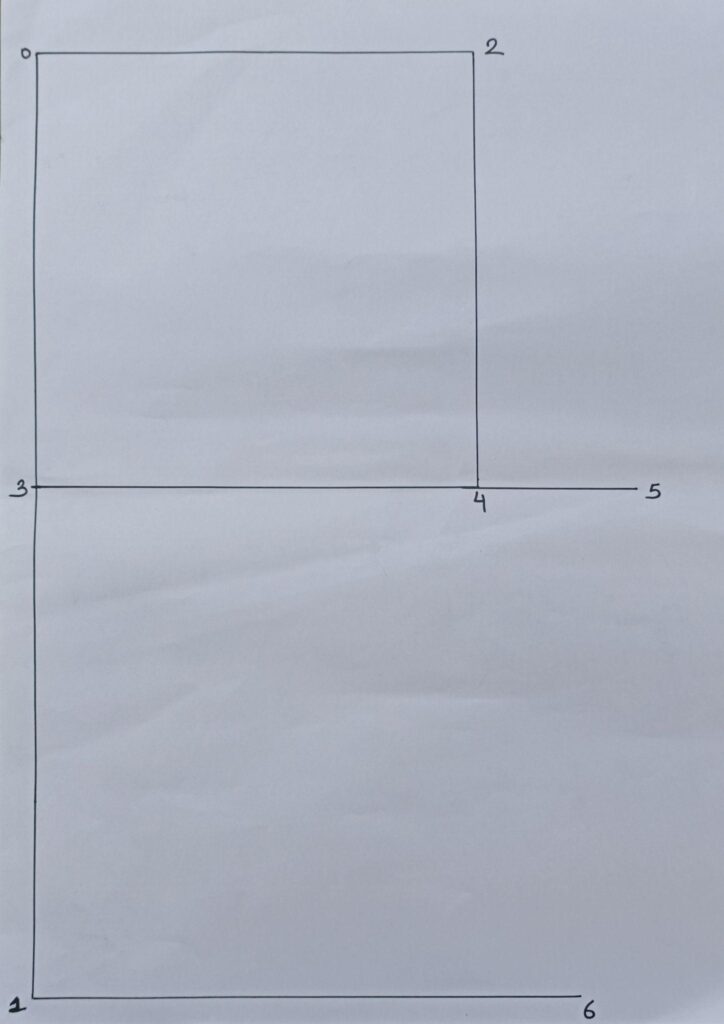
Step 5: (3-5) = chest/4 +½
Example: (3-5) = 36”/4 +½” = 9 ½”
Step 6: (1-6) = waist/4 + ½”
Example: (1-6) = 32”/4 + ½” = 8 ½”
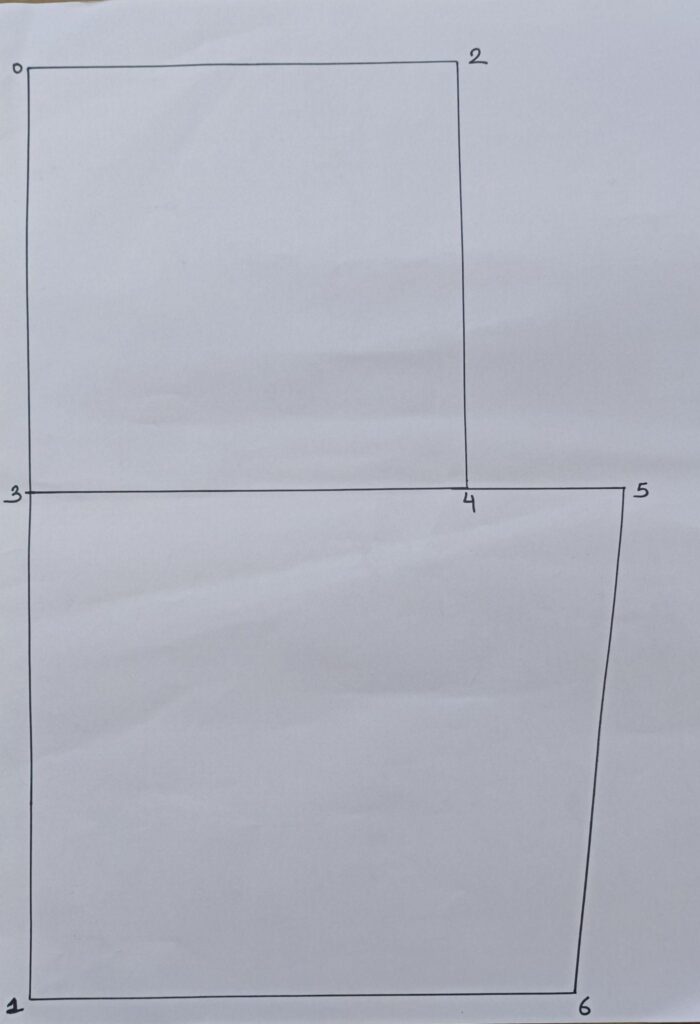
Step 7: Join 5 to 6
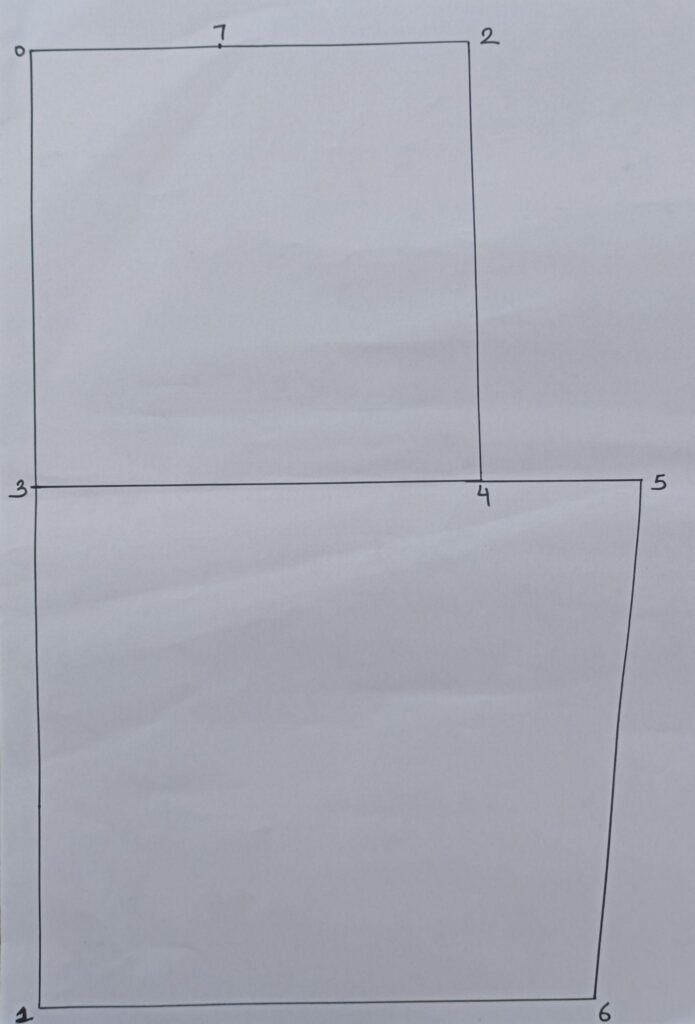
Step 8: (0-7) = chest/12 (neck width)
Example: (0-7) = 36”/12 = 3
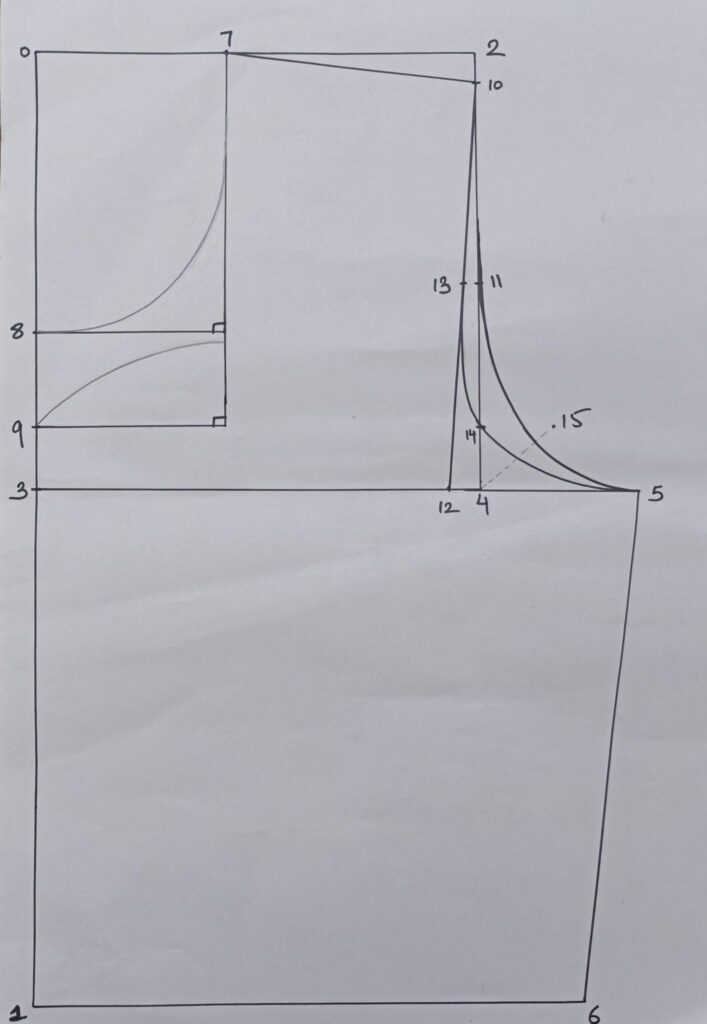
Step 9: (0-8) = chest/8 (back neck deep)
Example: (0-8) = 36”/8 = 4 ½”
Mark a 90’ degree square down from 7 and 8 for neck shape
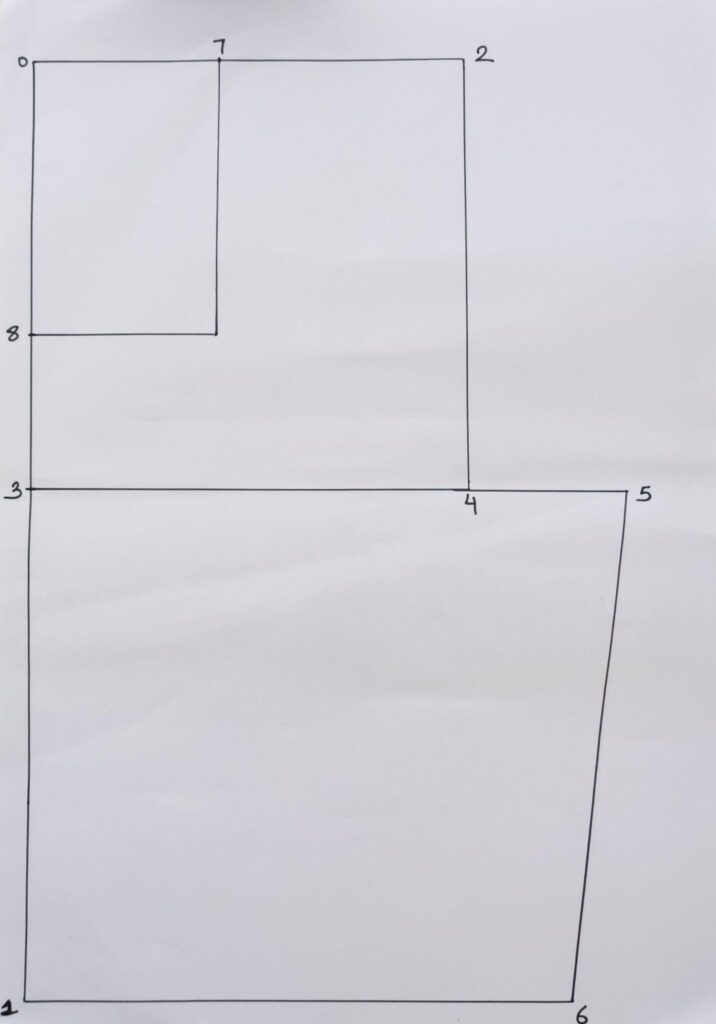
Step 10: (0-9) =chest/6 (front neck deep)
Example: (0-9) = 36”/6 =6”

Mark a 90’ square down for 7 and 9 for neck shape
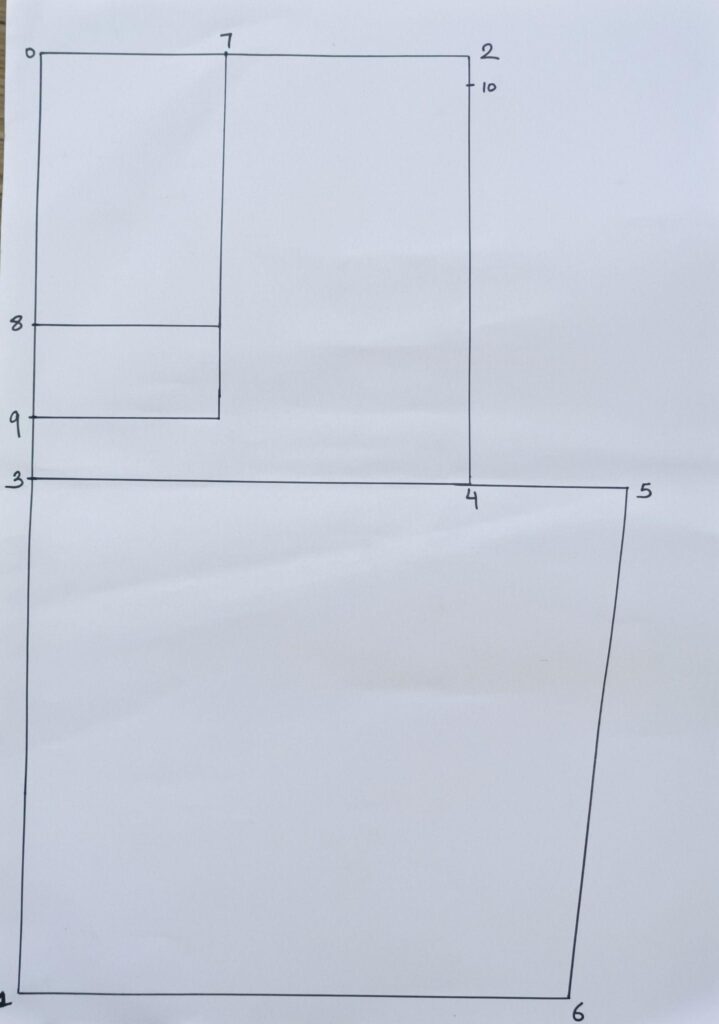
Step 11: (2-10)= ½” down (shoulder slop)

Step 12: Join 7 to 10
Step 13: 11 is the midpoint of (10-4)
Example: (10-4) =7″/ 2 = 3 ¼” where (10-11) and (11-4) = 3 ¼”

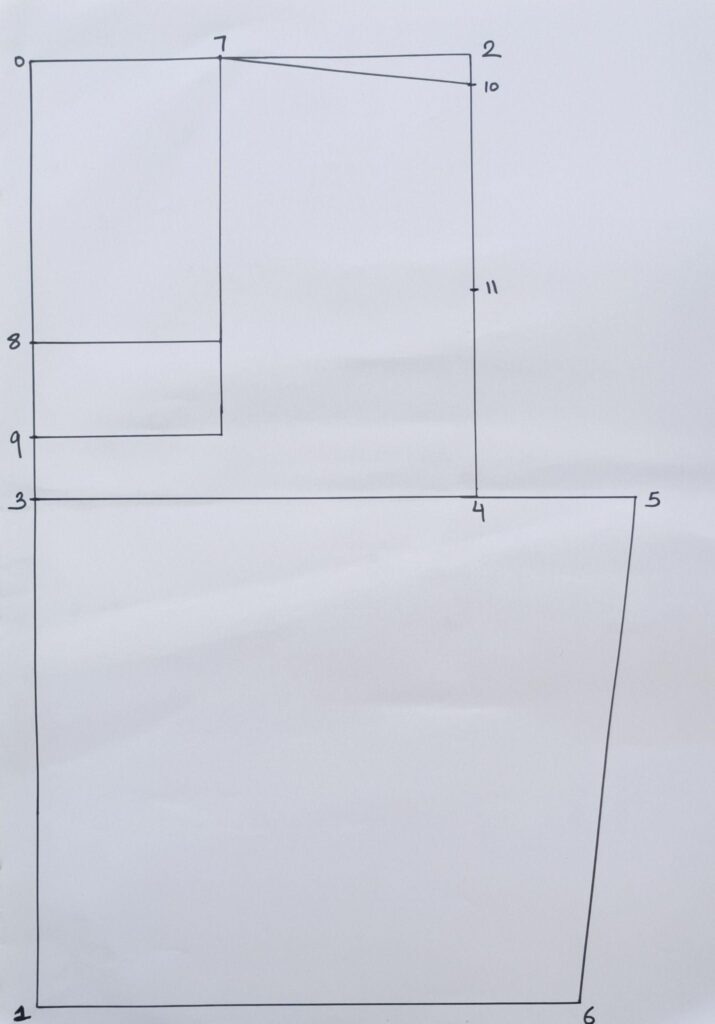
Step 14 : (4-12) =½” inside
Step 15: Join (10-12)
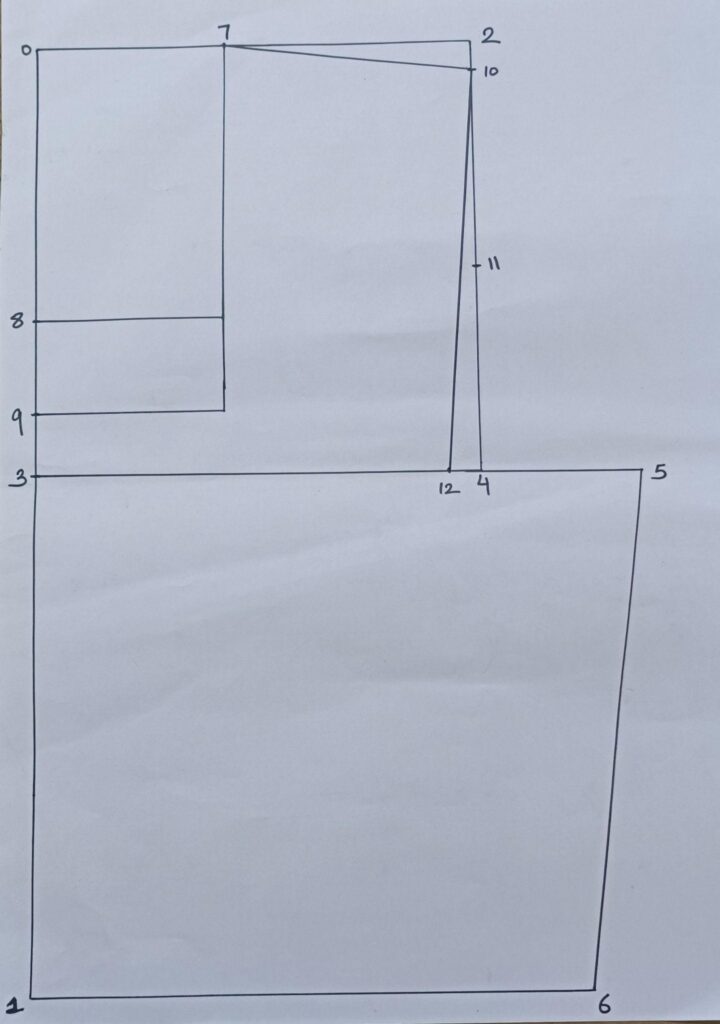
Step 16: 13 is the midpoint of (10-12)
Example: (10-12) = where (10-13) and (13-12) =
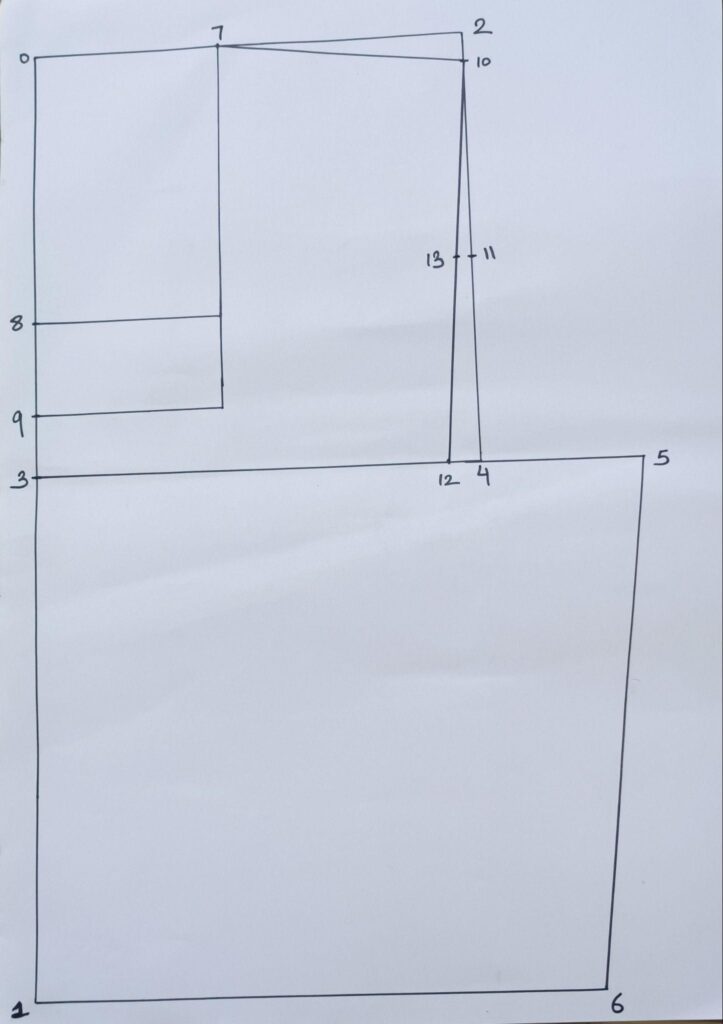
Step 17: (4-14)=1” up
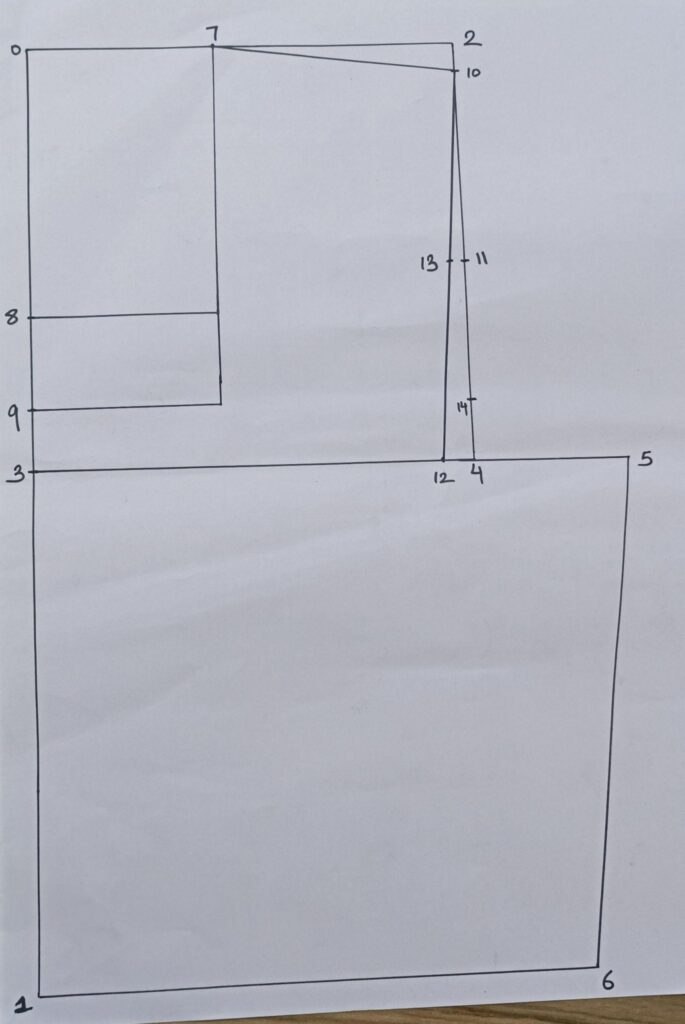
Step 18: (4-15) =1.5” at a 45’ angle
Step 19: Join 11-5 where the curve should be within or on the point 15 (back arm round)
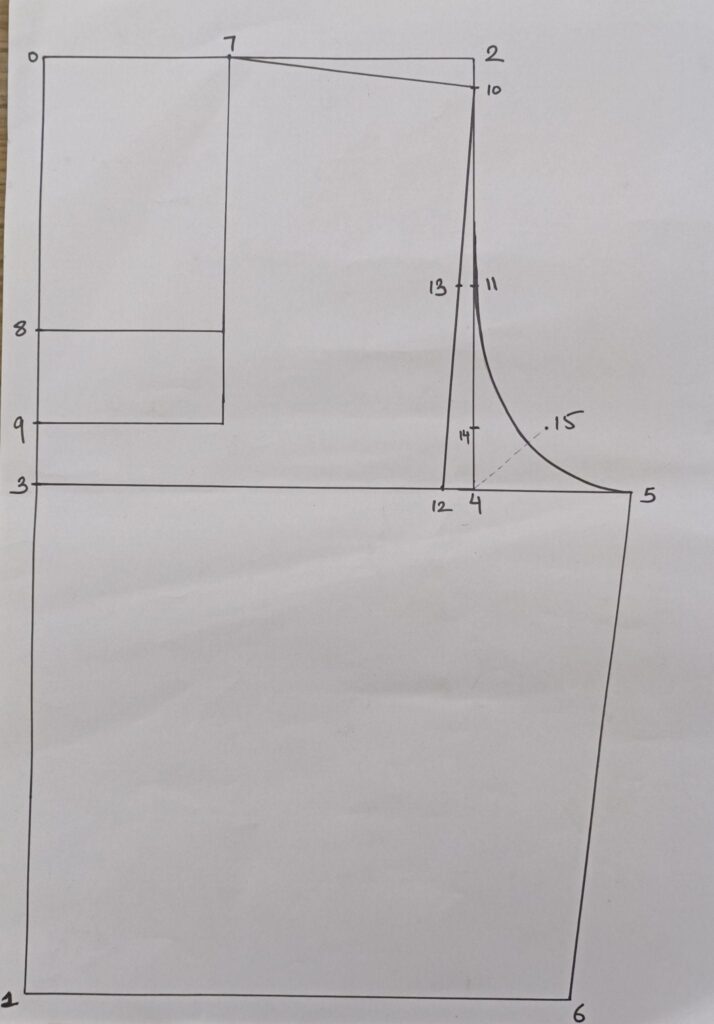
Step 20: Join 12-14-5 Where the curve should not cross point 14. (front arm round)
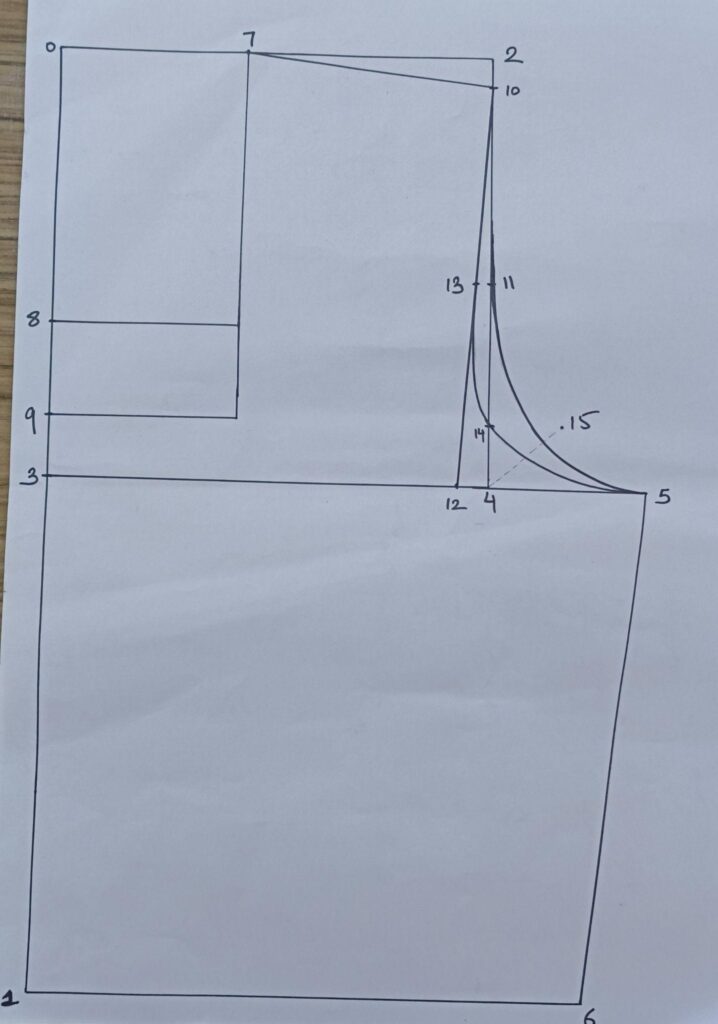
Step 21: For the back body block, cut along with line tracking from 8-7-10-11-5-6-1
Step 22: For the front body block, cut along with line tracking from 9-7-10-13-14-5-6-1
So now, you have seen how easy it is to draft a pattern of basic body block.
Yes, Now let us see,
Steps for stitching:
Step 1: Do neckline finishing and arms round finishing for the front part and back parts.
Step 2: Join shoulder
Step 3: Bottom finishing.
Step 4: Side join.
For more details on Stitching watch the video on YouTube link given below:
If you have tried this method, send me a photo of your basic bodice block in the comment box and let me know how you feel about the method.
If you feel this blog is helpful, and want to know any other pattern then you can comment me below with the pattern name.
Thank you, and have a good day.